

What is ComfyUI?
ComfyUI primarily operates on a node-based workflow, where modifying certain nodes allows for more precise control over the visuals. By combining different nodes, a variety of generation methods can be formed. Moreover, ComfyUI enables users to save their workflows and share them with others, allowing for the reproduction of their workflows.
Compared to Web UI, ComfyUI offers higher flexibility and faster image output. Let's take a closer look at how it operates.
1. Understanding the Txt2Img Workflow
1.1 start by clicking on create ComfyUI workflow

1.2 add the basic workflow for Txt2Img

The workflow in ComfyUI is similar to that in Web UI: select a model → enter prompt → set parameters → generate image.
1.3 Parameters:

control_after_generate: control over seed generation
fixed: fixing the seed
increment: adding 1 from the existing seed
decrement: subtracting 1 from the existing seed
randomize: random seed

scheduler: usually choose between normal or karras
denoise: which indicates the strength of noise reduction in image generation, the higher the value, the greater the impact and change on the image

size recommendation:
SD1.5: 512 * 512
SDXL: 1024 * 1024
2. How to add node?
2.1 First, add a core node: the sampler
Right-click: Add Node → sampling → KSampler

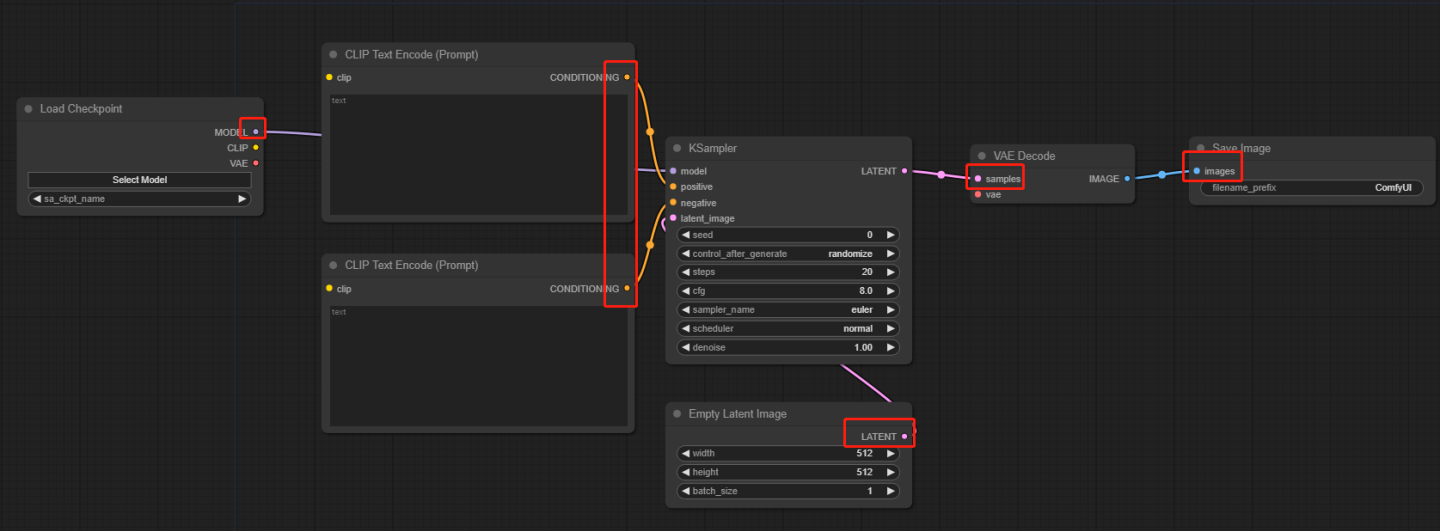
2.2 then pull out the sampler node and add corresponding nodes

model→CheckpointLoaderSimple
positive→CLIPTextEncode
negative→CLIPTextEncode
latent_image→EmptyLatentImage
LATENT→VAEDecode
IMAGE→SaveImage
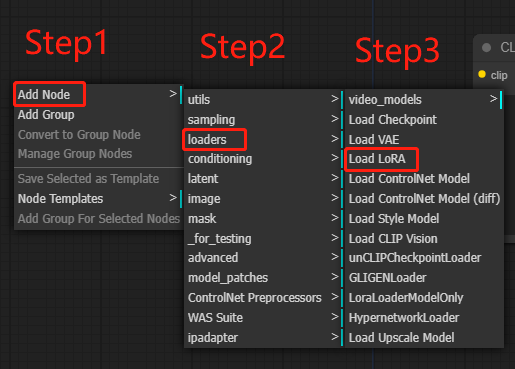
2.3 How to add LoRA?
Loaders: mainly used for loading the diffusion model, including model and LoRA.
Add Node→loaders→Load LoRA
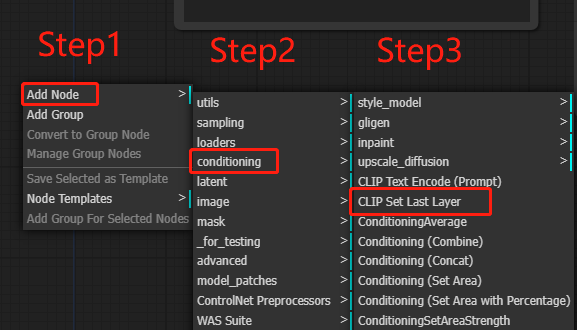
2.4 How to add Clip Skip?
Conditioning: guides the diffusion model to generate specific outputs, including Prompt, ControINet, Clip Skip, etc.
It is recommended to add Clip Skip to control the layers skipped, which helps adjust the final image details.
Add Node→conditioning→CLIP Set Last Layer
2.5 Connect nodes
After adding nodes, many nodes might not be connected yet. They need to be connected in order according to the sequence and matching colors.
Sequence: Checkpoint→LoRA→Clip Skip→Prompt→KSampler、Empty Latent Image→VAE Decode→Save Image


3. Starting the Txt2Img
3.1 Choose a Checkpoint

3.2 Select LoRA and adjust the weights

3.3 Set Clip Skip, typically choosing to set it to -2

3.4 Enter prompt

3.5 Set relevant parameters:
Since the SDXL model is chosen here, set the sampling steps to around 40, and image size to 1024*1024

3.6 Click Generate

3.7 View the results

4. Tips
4.1 Modify node title
Modify node titles by right-clicking the title and selecting Title.

4.2 Canceled by the system

1. Reason:
4.2.1 Check if all nodes are connected
4.2.2 Ensure the node sequence is connected correctly
4.2.3 Confirm the model selection
4.3 Searching for nodes
Double-click in an empty space with the left mouse button

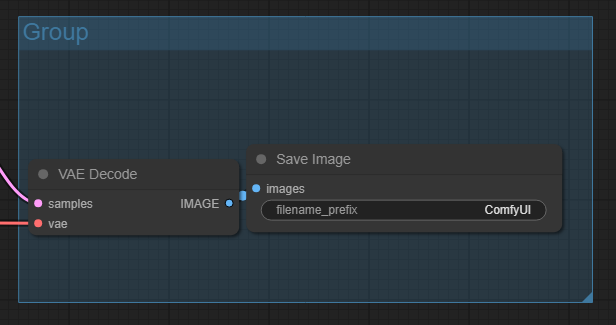
4.4 Create a Group:
Group nodes together so they can be moved simultaneously. Right-click and select "Add Group," then drag from the bottom right corner to select nodes within a Group box.
4.5 Minimize the Node Page:
Click the grey button in the top left corner of the node


4.6 Workflow creation, saving, and downloading

